I Ruined 12 Jars Before Mastering These Pickle Recipes—Here’s What Actually Works
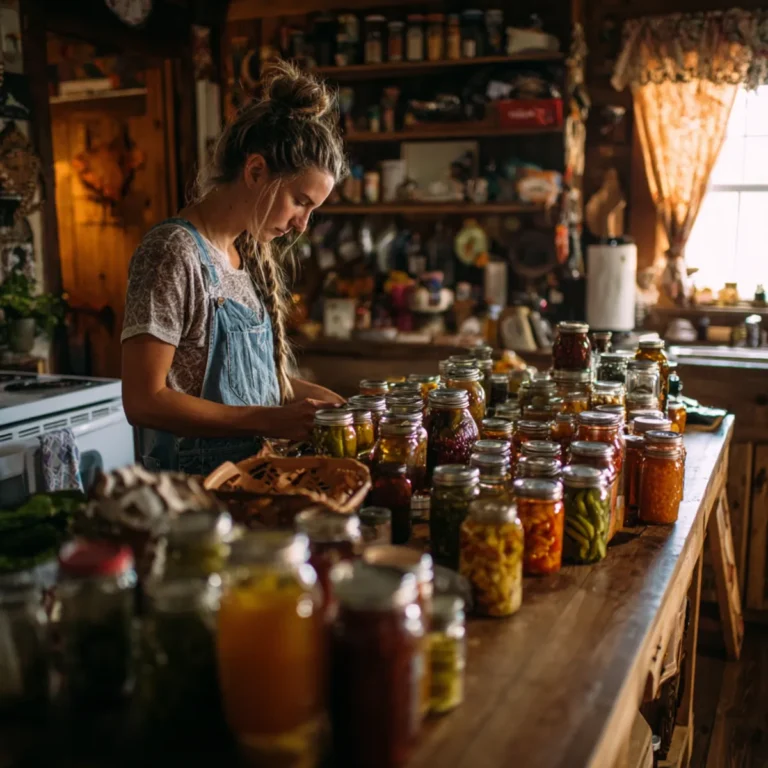
The jar didn’t shatter dramatically. It just cracked along the bottom seam sometime in the night and leaked pickle brine across the shelf until it pooled on the floor. I found it at two in the morning because I couldn’t sleep and went to the kitchen for water, and stepped in it barefoot. That was jar number seven. I had five more failures ahead of me before anything I put up was actually worth eating. I’d been reading every canning recipe I could find—searching for the best canning recipes for pickles and relish the way some people research cars—and none of them had warned me that my farmhouse kitchen would fight me every step of the way.
Three years out of the suburbs and I still manage to ruin things that our grandmothers did without the internet. So here’s what I actually learned from it.
The jar that exploded on my shelf at 2am
It wasn’t an explosion. I want to be accurate. It was a slow failure—a thermal crack from putting a hot jar on a cold wooden shelf, which is a rookie mistake that exactly zero of the recipes I was reading bothered to mention in plain language. The brine was still warm. The shelf was not. I’d been so focused on the water bath timing and the vinegar ratios that I skipped the part where you let things cool properly on a folded towel, not a surface that conducts cold.
Before that one, I lost two jars to under-processed lids that looked sealed but weren’t. One more to a jar with a tiny rim chip I hadn’t spotted. Two to relish that I packed too hot into jars I hadn’t warmed at all. The failures were not random. Each one had a cause. That part was actually useful to figure out, even though figuring it out cost me about fourteen dollars in cucumbers and a bad mood for most of August.
How to actually prepare jars for canning pickles and relish
This is the part that most recipes rush through in two sentences. Don’t let them.
- Inspect every jar rim under real light. Run your finger around the rim and look for chips or cracks. A chipped rim won’t seal. Toss it or use it for dry storage only.
- Wash jars in hot soapy water even if they’re brand new. Rinse well. Residue from storage interferes with sealing.
- Keep jars hot until you fill them. Set them in a pot of simmering water (not boiling) while you prep your produce. Pull them one at a time.
- Warm your lids but don’t boil them. Simmer in hot water to soften the sealing compound. Boiling can degrade it.
- Use a jar lifter, not tongs. Tongs slip. A proper canning jar lifter costs about eight dollars and is not optional.
- Set filled jars on a folded towel, not a bare counter. Temperature shock is real. This is what ruined my shelf jar.
- Process according to tested times only. The National Center for Home Food Preservation has tested recipes with specific processing times. Use them, not a random blog’s times, including mine.
- Check seals after 12 to 24 hours. Press the center of the lid. If it flexes, it didn’t seal. Refrigerate and use within a few weeks or reprocess within 24 hours.
Why the fancy recipes don’t mention your actual kitchen
Canning books are written in test kitchens with good ventilation, consistent burner output, and counter space. My kitchen has a gas range that runs slightly hot on the left rear burner, a window that lets in a draft when the wind comes from the east, and about eighteen inches of usable counter that isn’t covered in coffee cups or seed catalogs. Ben keeps his current project notes on the kitchen table, which this summer was a full diagram for a new goat shelter. Pepper had gotten out again and damaged the old one, so the timing made sense to him.
The gap between cookbook instructions and what actually happens in a working farmhouse kitchen is real and nobody writes about it honestly. The instructions say “maintain a rolling boil.” My canner, on my stove, on a hot August afternoon when the ambient temperature in that kitchen is pushing eighty-five degrees, behaves differently than it does in October. Processing times assume you can regulate heat consistently. Whether you actually can depends on your equipment and your house.
I once kept a rolling boil for eleven minutes by standing there with a lid half-on and adjusting the burner every ninety seconds while Hank sat on the porch railing watching me through the window like I owed him an explanation.
This isn’t a complaint with no solution. The solution is to learn your stove. Do a dry run with just water before your first real batch. Figure out what setting produces a genuine rolling boil in your canner and write it down somewhere. The fancy recipes assume you already know this. You probably don’t yet.
Vinegar ratios: where I still disagree with myself
Standard tested dill pickle recipes call for a one-to-one ratio of vinegar to water, using five percent acidity vinegar. I followed this exactly. My first decent batch turned out sharp to the point of being hard to eat. My third batch, same recipe, same brand of vinegar, tasted noticeably milder. I cannot fully account for the difference.
My best guess is cucumber variety. The first batch was from a neighbor’s garden—I don’t know what she planted. The third was from my own pickling cucumbers, direct seeded in late May, harvested when they were about four inches long. Whether that’s actually the variable I have no way to confirm. Ben says I’m overthinking it and the real answer is that I was probably just used to the taste by the third batch. He might be right. I genuinely don’t know.
What I do know is that adjusting vinegar ratios in home canning is not something to experiment with for safety reasons. The USDA and tested recipe sources are specific about acidity levels because that’s what makes canned pickles safe. If you want a milder result, look for tested recipes that are designed that way—bread and butter pickles, for instance, use sugar to balance the acid rather than reducing the vinegar. Don’t just cut the vinegar in half and hope.
What you need before you start (the non-negotiable list)
- A real water bath canner with a rack. The rack keeps jars off the direct heat and lets water circulate. A tall stockpot without a rack is not the same thing, and jars sitting on bare metal get uneven heat.
- A jar lifter. Already mentioned. Get one.
- A wide-mouth canning funnel. Filling jars without one is how you get brine all over the rim and end up with failed seals.
- A bubble remover or thin spatula. Air pockets affect headspace and seal quality.
- A kitchen scale if you’re making relish. Volume measurements for chopped vegetables are inconsistent. Weight is not.
- New lids every time. Rings can be reused if they’re not rusty or warped. Flat lids cannot. This is not a place to economize.
- A tested recipe from a reliable source. Ball Complete Book of Home Preserving is a solid starting point. The NCHFP website is free and thorough. These are the two resources I actually use.
- A timer you will actually watch. I use the one on my phone. Processing time starts when the water returns to a full boil after you lower the jars in, not when you put the lid on.
The relish batches that turned out perfect for reasons I can’t replicate
My second summer here, I made three batches of sweet pickle relish in one week. The first batch was fine. The second batch was genuinely good—the kind of thing you’d put on a hot dog and actually notice. The third batch tasted like the first one. I used the same recipe all three times, the same cucumbers picked on the same day, the same white onions from the same store.
The only variable I can identify is that the second batch sat in its salt brine for about six hours longer before I rinsed and cooked it. Maybe that mattered. Maybe I was more careful about draining it. I wrote “let it go longer next time” in my canning notes and then got distracted by some issue with June getting into the herb spiral, and by the time I made relish again the following year I’d forgotten what I meant.
I don’t have a takeaway from this. Sometimes food just works and you can’t fully explain why.
Twelve jars and what they taught me (mostly frustration)
Two thermal cracks. Two false seals. One rim chip I should have caught. One batch where I measured the headspace wrong and lids buckled during processing. Six jars that were fine but mediocre. And then, eventually, something that tasted like what I was trying to make all along.
The twelve failures cost me a full flat of cucumbers, about three hours of processing time spread across multiple evenings, and some real irritation. The cost to actually get equipped was around forty-five dollars for a starter canning kit—jar lifter, funnel, bubble remover, and a basic rack. I already had a stockpot large enough to serve as a water bath canner. If you’re starting from scratch, budget sixty to eighty dollars before you buy a single cucumber.
What I don’t have is a clean lesson that made all of it worth it. The pickles are better now. The relish is mostly reliable. I still get nervous every time I set jars on the towel to cool, listening for the ping of a sealing lid, and I still feel a specific kind of dread when one jar on a batch is quiet and the rest have popped. Twelve failures didn’t make me confident. They made me more careful. That’s not the same thing, but it’s probably what actually keeps the jars from cracking on the shelf at two in the morning.
If you want tested pickle and relish recipes that account for food safety properly, start at nchfp.uga.edu before you look anywhere else. Everything else is commentary, including this.