Raised Bed Gardening With Pea Gravel Layout: We Wasted $800 on Wood Borders First
Ben looked at the pile of rotting cedar boards last spring and said, “I mean, we got two years out of them.” Two years. On boards that cost us over four hundred dollars. I did not find that comforting.
We had tried the whole raised bed gardening with pea gravel layout thing after the cedar disaster, mostly out of desperation, and I’m still not sure it was the right call. But it’s what we’re doing now, so here’s what actually happened.
The $800 Mistake We Made First
The first year we put in raised beds, I over-researched it the way I over-research everything. I read forums for weeks, made a spreadsheet, decided we needed cedar because it was “natural” and wouldn’t leach anything into the soil. Ben wanted to use pressure-treated lumber because his dad always had. I won that argument and spent about $420 on cedar boards from the lumber yard in town. We built three beds, they looked great, and by the end of the second season the corners were already soft. By the third spring, two of them had collapsed at the joints.
Then Ben found some pressure-treated boards on sale and built a fourth bed without asking me. That one is still standing. I haven’t told him I think he was right about that.
We also tried cheap pine boards one summer — $38 total, lasted about fourteen months before the bottom edges turned to mush. So between the cedar, the pine experiment, the hardware, and the bags of organic soil mix we bought to fill them, we spent somewhere around $800 on wood-bordered raised beds over two years. Most of that money is now composting in the yard.
How to Build Raised Beds With Pea Gravel Borders (The Steps)
We switched to pea gravel borders the second summer, mostly because I read one forum thread at midnight and convinced myself it made sense. Here’s what actually worked for us in Zone 7a Tennessee, where we don’t get our last frost until mid-April:
- Mark your bed area with spray paint or stakes and string. Ours are roughly 4×8 feet. Wider than that and you’re reaching too far from the sides.
- Dig a shallow trench around the perimeter — about 4 inches deep and 6 inches wide — where the gravel border will sit. This gives the gravel somewhere to settle instead of just spreading into your paths.
- Fill the trench with pea gravel. We used a 3/8-inch pea gravel from the landscaping supply place outside of town. Two tons covered our three beds with paths between them. Expect to spend around $120–180 depending on your supplier and how much area you’re bordering.
- Compact it lightly. Ben used a hand tamper — the $30 kind from Tractor Supply — to press it down. You don’t need a plate compactor for this scale.
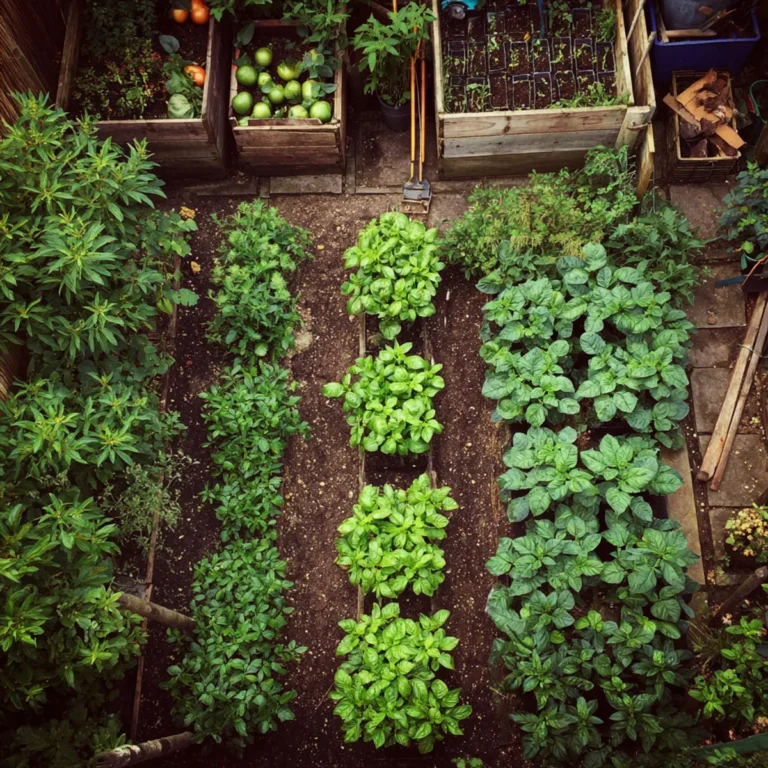
- Build up your soil in the interior to whatever height you want. We used a mix of compost, topsoil, and aged goat manure from Pepper and June. We didn’t buy raised bed kits or pre-mixed soil — at current prices that would have run us another $200 easy.
- Plant 6 weeks before last frost for cool-season crops, or wait until after mid-April for anything frost-sensitive. The gravel border itself doesn’t affect soil temp, but it does hold daytime heat near the bed edges a bit longer into the evening.
- Wood borders rot faster than anyone tells you — even cedar
- Pea gravel borders are cheap upfront but require edge maintenance
- Drainage claims are real but also complicated
- Weeds come through gravel more than expected
- The ten-year cost math works out better for gravel, but only if you stay put
Ben Says the Drainage Thing Works Better
Ben’s main argument for the gravel borders — beyond the cost — is drainage. His exact words were something like, “Water just moves through it, it doesn’t pool up against the wood and rot it out.” And there’s something to that. The beds we have now don’t have that soggy-corner problem the cedar ones developed. When we get those hard August rains that Tennessee likes to throw at us, the water moves through the gravel paths and away from the bed edges instead of sitting.
But I want to be honest that I can’t tell you whether the plants actually do better because of drainage, or whether our beds just look healthier because the soil mix is better than what we started with. Ben thinks it’s the drainage. I think we improved too many variables at once to know. Neither of us has a control group.
“Water just moves through it. It doesn’t pool up and rot things out.” — Ben, who built a chicken door the chickens refused to use but is probably right about this.
Adjusting beds mid-season without losing plants
This is the part nobody really talks about with pea gravel borders. With wood, once the bed is built, it’s built. With gravel, you can actually shift things around mid-season without destroying anything. This sounds minor until you need to do it.
- We extended one bed by two feet in July without disturbing the existing tomatoes — just raked the gravel border out, added soil, and kept going.
- When June got into the garden last summer and stomped through the corner of one bed, we raked the gravel back and rebuilt the edge in about twenty minutes. A broken wood corner would have needed new lumber and screws.
- We shifted a path width between two beds after realizing our wheelbarrow didn’t fit — again, just raked and reset. No tools required beyond a garden rake.
- No hardware, no waiting on lumber, no weekend project. This sounds small but it has saved us actual time twice now.
The Drainage Contradiction (Or Maybe Not)
Here’s where I complicate everything I said earlier. We planted chamomile along the gravel border last spring because I’d read it liked good drainage. It did fine. We also planted basil near the border and it did fine. But the carrots we tried along the same edge bolted fast and tasted bitter, and someone at the farmers market told me carrots hate any kind of heat reflection from gravel. I don’t know if that’s true or if our carrots just had a bad year.
The deeper problem is that pea gravel can hold a weird amount of moisture underneath it when it’s covered or partially shaded. We found a section under the leaning greenhouse overhang that was consistently damp under the gravel even during dry weeks. For some plants that moisture reservoir might help. For others — anything prone to root rot, anything that needs dry feet — it might cause problems.
I don’t have a clean answer here. We’ve had good years and bad years in the same beds. I can’t tell you confidently that the gravel drainage situation is a net positive. It might be neutral. It might depend entirely on what you’re growing and where you live.
Does Any of This Actually Save Money?
Upfront, not really. Two tons of pea gravel plus delivery was about $155 for us. The hand tamper was $30. So roughly $185 to border three beds, not including the soil inside. The cedar beds cost more, yes, but they also looked a lot nicer for about eighteen months.
Where the math shifts is replacement cost. Wood borders in our climate — humid summers, wet springs, ground that never fully freezes — seem to last two to four years at best, even treated wood. If you replace them every three years over a ten-year period, you’re spending $600 to $900 on borders alone. The pea gravel, if you top it off every year or two with a fresh bag or two ($8–12 a bag at most farm supply stores), costs maybe $60 over that same decade.
So yes, it saves money. But only if you’re planning to stay put for ten years and you actually do the maintenance. If you move, if you change your layout, if you decide to try something else in year four — the savings disappear. It’s not a universal win, it’s a long-game calculation.
We Still Haven’t Solved the Weeds Problem
Pea gravel does not stop weeds. I want to be clear about this because a lot of what I read before we switched implied that gravel paths and borders were lower maintenance than mulch or wood. They are not. Weeds come up through gravel constantly, and they root into the gravel in a way that makes them annoying to pull because you’re fishing around in stones.
We tried landscape fabric under the gravel the first year. It worked for about four months and then the weeds found the edges and the seams and came through anyway, and now we have landscape fabric buried under gravel that we can’t remove without redoing the whole border. That was a mistake. We tried hand-pulling all season last year. It took probably an hour a week across the three beds, and I still didn’t stay ahead of it. I don’t have a solution. This is the part of the pea gravel setup that nobody told us about and that I’m still annoyed about.
Why People Still Buy Wooden Borders (And Why That’s Fine)
I’ve spent most of this article making a case that wood borders are a bad investment, and I want to walk that back a little. The cedar beds we built that first year looked really good. They photographed well. When we had people over, nobody looked at the garden and said “nice gravel.” The wood beds had a warmth to them that gravel paths don’t replicate.
If you rent your place and aren’t planning a ten-year horizon, wood makes more sense. If you care about the aesthetic and not just the function — which is a completely reasonable thing to care about — wood makes more sense. If you’re doing a small kitchen garden and not replacing boards constantly, the cost difference is marginal. Pea gravel isn’t objectively the right choice, it’s just the choice that fit our situation, our budget, and our willingness to deal with gravel maintenance instead of wood maintenance.
Hank wandered through the gravel paths yesterday and sat in the middle of the herb spiral for a while, which he does sometimes for no apparent reason. He didn’t seem to have an opinion on the border material. Maybe that’s the right attitude.
We’re three years into this place now and I still don’t know if we set up the garden the best way. The question I keep coming back to is: if we’d just built good wood borders from the start — real cedar, proper joinery, sealed corners — would we have spent less than the gravel and maintenance combined? I genuinely don’t know, and I’m not sure how to find out.