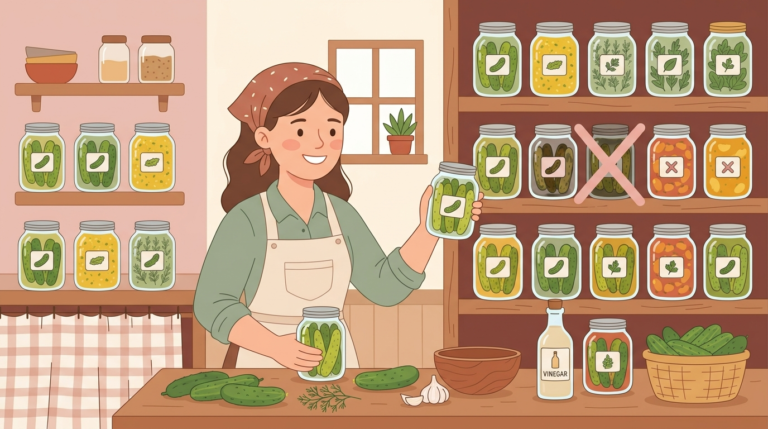
The Summer I Mastered Canning Pickles and Relish (Barely)
Every list of the best canning recipes for pickles and relish points to the same handful of sources, and most of them agree on the basics: use pickling cucumbers, get your brine ratio right, process in a water bath. I followed that advice exactly our first summer out here and ended up with eight jars of soft, vaguely sour cucumbers that Ben politely described as “interesting.” What actually works on this property, after three summers of testing, looks different from what gets pinned and reshared.
I’m not saying the standard advice is wrong. Some of it is non-negotiable for food safety—the National Center for Home Food Preservation exists for a reason, and their tested recipes are the baseline I check everything against. But there’s a gap between a tested recipe and a reliable result, and filling that gap took longer than I expected.
The Recipe Everyone Recommends Isn’t the One I Use
The most-shared dill pickle recipe online calls for a 1:1 ratio of water to white vinegar, plus two tablespoons of canning salt per quart. That’s it, roughly. Clean, simple, repeatable. And it is repeatable—I’ve watched it work for people in every comment section I’ve read.
What I use now is closer to a 3:2 ratio of vinegar to water with one and a half tablespoons of pickling salt per quart. More acidic. Less water. The cucumbers come out firmer, and I’ve had better seal retention through the summer heat here in Tennessee. Whether that’s the ratio or something else entirely, I genuinely don’t know. But I stopped changing it.
The counterintuitive part: higher acid doesn’t always mean more sour flavor. The garlic, dill, and processing time affect taste more than a small shift in the brine ratio. What the extra acid does is give you more buffer if your cucumbers were slightly older than ideal when you picked them, or if your kitchen runs warm. In July here, my kitchen runs very warm.
“The cucumbers come out firmer, and I’ve had better seal retention through the summer heat here in Tennessee. Whether that’s the ratio or something else entirely, I genuinely don’t know.”
What actually goes into my jars (step by step)
This is my current working process for both a dill pickle base and a bread-and-butter relish. These aren’t quick-pickle recipes—they’re meant to be shelf-stable, water-bath canned jars.
Dill Pickle Base (per quart jar):
- Wash cucumbers thoroughly and slice off the blossom end—this is the step most tutorials mention once and then gloss over, but it matters. The blossom end contains enzymes that soften pickles during storage. Cut off at least an eighth of an inch.
- Soak cucumber slices or spears in ice water for two hours before packing. This firms them before they ever touch the brine.
- Bring brine to a boil: three cups apple cider or white vinegar (5% acidity), two cups water, one and a half tablespoons pickling salt. No substitutions on the salt—table salt clouds the brine and can affect the chemistry.
- Pack jars with cucumbers, two cloves garlic, one head fresh dill or one teaspoon dill seed, and optional red pepper flakes.
- Ladle hot brine over cucumbers, leaving half-inch headspace. Wipe rims. Apply lids to fingertip-tight, not cranked down.
- Process pints for ten minutes, quarts for fifteen minutes in a boiling water bath. Start timing only when the water returns to a full boil after the jars go in.
- Remove jars and do not touch for twelve to twenty-four hours. Do not press the lids to check seals while they’re still hot—you’ll seal them manually and miss a failed seal later.
Bread-and-Butter Relish (makes about six half-pints):
- Finely chop four cups cucumbers, one cup white onion, one cup bell pepper.
- Toss with two tablespoons pickling salt, cover, and let sit for two hours. Drain and rinse twice.
- Combine two cups white vinegar, one and a half cups sugar, one teaspoon mustard seed, half teaspoon celery seed, half teaspoon turmeric in a large pot. Bring to boil.
- Add the drained vegetables. Return to a boil and simmer five minutes.
- Ladle into hot sterilized half-pint jars, quarter-inch headspace. Process ten minutes in a water bath.
- Blossom end removal—don’t skip it
- Ice water soak before packing, minimum two hours
- Vinegar must be 5% acidity—check the label, not all vinegars are the same
- Headspace matters: too much or too little affects the seal
- Let jars sit undisturbed for 24 hours after processing
The vinegar thing nobody mentions
White vinegar and apple cider vinegar are both rated at 5% acidity, and most recipes treat them as interchangeable. In terms of food safety, they largely are. But they don’t behave the same way in the jar over time.
Jars I’ve made with apple cider vinegar tend to darken slightly over three to four months. The cucumbers take on a slightly amber cast. This doesn’t seem to affect the taste—if anything, I prefer the flavor—but it surprised me the first time I opened a jar in November that looked nothing like it did in August. White vinegar stays clearer. The relish made with white vinegar holds its color better through the winter.
I’ve also noticed that batches made with apple cider vinegar seal less consistently for me, though I can’t say if that’s actually the vinegar or something else I’m doing differently on the days I use it. It could be temperature. It could be which batch of lids I grabbed. I don’t have a controlled enough setup to know for sure, so I’m just reporting what I’ve observed.
That summer I had 8 jars go soft after three weeks
Second summer here. I was confident. I had a system. I’d done a full canning session in mid-July—twelve quarts of dill pickles, eight quarts of bread-and-butter style, and a few half-pints of relish. The seals all popped down. I’d checked the headspace carefully.
Three weeks later I opened a jar for a cookout and the cucumbers were soft. Not dangerous-soft necessarily, but the texture was completely wrong—they bent rather than crunched. I opened a second jar. Same thing. I went through every jar from that batch and found eight of them had the same problem, all from the same canning session.
The seals were intact. The lids hadn’t bulged. I couldn’t find a clear reason. My best guess is that the cucumbers I used that week were older—I’d let them sit in the refrigerator for five days before I had time to process them—and the enzymes had already started breaking down the cell walls. The ice water soak and the blossom-end removal weren’t enough to counteract that. But I don’t know for certain.
We threw them out. All eight quarts. The relish from the same session was fine, which makes sense—relish is cooked down anyway, so texture doesn’t survive regardless.
I didn’t find a fix. The next batch I made, I used cucumbers picked that morning, and they came out fine. But I’ve also had cucumbers sit four days in the fridge and come out fine. I can’t reliably reproduce the failure to figure out what actually caused it.
Why my relish works even though I’m doing it ‘wrong’
Standard canning advice says to use only tested recipes with exact ratios, and to not add or remove ingredients that might affect acidity or density. I break one of those rules with my relish: I add a small amount of grated carrot and sometimes jalapeño, neither of which appears in most tested relish recipes.
By the book, this could be a problem. Adding low-acid vegetables to a canned product theoretically changes the pH, which is how you end up with unsafe jars. The NCHFP is clear that you shouldn’t make substitutions that increase the proportion of low-acid ingredients in a tested recipe.
What I actually do: I keep the added carrot or jalapeño to roughly ten percent of the total vegetable volume, and I bump my vinegar slightly to compensate. Is that safe? I think so, but I can’t prove it without pH testing, which I haven’t done. The University of Tennessee Extension would probably tell me to stick to tested recipes. They’re not wrong to say that.
But here’s what I notice: the relish consistently seals, consistently looks and smells right when I open it, and has never shown any signs of spoilage across two full growing seasons of making it this way. That’s not proof. It’s just what’s happened so far. I’m genuinely not certain whether my modification is safe by the numbers or whether I’ve been lucky, and I think that uncertainty is worth naming rather than glossing over.
If you want to add vegetables to your relish, pH strips or a home pH meter would at least tell you where your brine lands. They run about $15 to $30 at kitchen supply stores or online. I bought one and then lost it somewhere in the leaning greenhouse, so I’m still working on actually testing mine.
Equipment I thought I needed (and actually do)
- Water bath canner with rack: The rack matters more than the pot. You need airflow under the jars or the heat doesn’t distribute evenly. I use a standard 21-quart enamel canner—around $30 to $40—and it holds seven quarts at once.
- Jar lifter: Not optional. Silicone oven mitts don’t work. The jar lifter grips the neck of the jar and keeps it vertical while you move it. Mine cost $8 at Tractor Supply.
- Wide-mouth funnel: A dollar-store funnel works fine for most liquids but is too small for relish or any chunky brine. Get the wide-mouth canning funnel specifically—it’s usually $5 to $7 and saves an enormous amount of mess.
- Lid wand or magnetic lid lifter: You’re supposed to keep lids in simmering water until you use them. The magnetic wand lets you pull them out without contaminating the water. Cheap and genuinely useful.
- Bubble remover or thin spatula: Running this around the inside of the jar before sealing removes air pockets that would otherwise affect the headspace. I use a wooden skewer in a pinch.
- A real thermometer: Not for the brine—for the water bath. You need a full rolling boil, not just steam. The difference matters for processing time.
What I don’t use: a pressure canner for pickles or relish. The high acid content means water bath canning is appropriate here. For low-acid vegetables you absolutely need a pressure canner, but pickles are not that.
TL;DR: Remove the blossom end, soak cucumbers in ice water before packing, use vinegar with confirmed 5% acidity, don’t mess with headspace measurements, and check NCHFP for tested processing times. Soft pickles are usually caused by old cucumbers or skipping the blossom end step.
Still not confident about the water bath timing
We’re at roughly 900 feet elevation here in middle Tennessee. The standard processing time adjustments for altitude kick in above 1,000 feet, which means I should be fine using the standard times without adjustment. And I do. But I still second-guess it.
The USDA and NCHFP guidelines are based on tested recipes at specific jar sizes and specific altitudes. The ten-minute processing time for pint jars of pickles assumes you’re starting the timer when the water reaches a full boil, not when you put the jars in. That part I’m sure about now. But whether my stove maintains a consistent enough boil, whether the cold jars drop the temperature enough to affect the outcome, whether my old enamel canner distributes heat evenly—I genuinely don’t know.
Every batch I’ve processed has sealed and has looked right when I open it. Three summers, a lot of jars. But I still stand in front of the stove during those ten minutes and wonder if it’s actually enough. I don’t have a way to resolve that without lab testing I’m not set up to do. What I can say is that following the tested recipe times exactly, using tested recipes as the starting point, and checking for proper seals before storage is the minimum. After that, you’re doing the same guesswork everyone else is doing and hoping the process science holds up in your specific kitchen.