I Grew Garlic in Patio Containers—Here’s What Actually Worked
Most of what I read about how to grow garlic in containers on patios made it sound simple. Grab a pot, stick some cloves in, water it. The forums I spent two nights reading—while my bookkeeping work sat open in another tab—made container garlic seem like the most forgiving project imaginable. It is not. But it’s also not as complicated as the other half of those forums suggested. I grew garlic in containers for the first time last year, and I’m going to tell you what the setup actually looked like before I get into how it went wrong in several specific ways.
For context: I have a half-acre kitchen garden out back, three raised beds, and a slightly leaning greenhouse that Ben keeps saying he’ll re-level before winter. I didn’t need to grow garlic in containers. I did it partly as an experiment and partly because I’d used up my raised bed space on late tomatoes that weren’t going to do anything anyway. So the patio along the south side of the wrap-around porch became my container garlic setup for the season.
What containers actually work (and what doesn’t)
Ben thought I was overthinking the container selection. He was partially right. But there are a few things that actually matter.
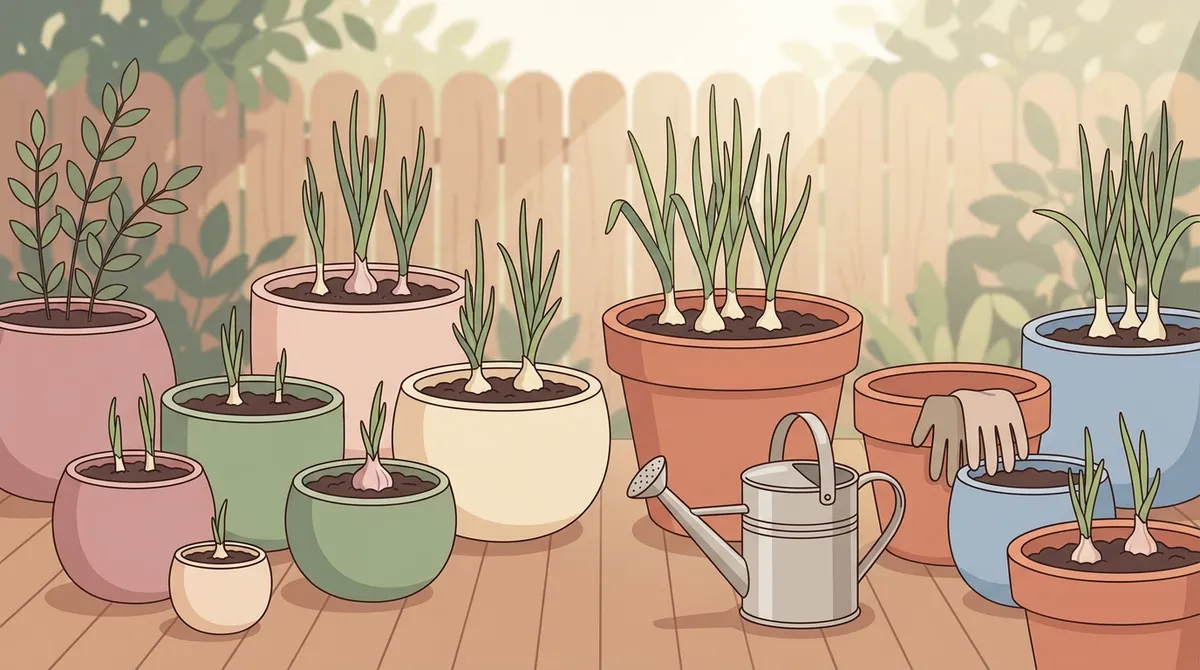
- Minimum depth: 8 inches, ideally 10–12. Garlic forms its bulb underground and needs room to develop. I tried one 6-inch pot as a comparison and got scallion-sized stubs.
- Drainage holes are non-negotiable. I lost cloves in a glazed ceramic pot that had one small hole—it looked drained but wasn’t moving water fast enough. Drill additional holes if needed. Seriously.
- Wide pots beat tall, narrow ones. A pot that’s 12 inches wide and 10 inches deep will grow more garlic than a tall, skinny 5-gallon bucket with the same volume. You can plant multiple cloves per container if you have 6 inches of horizontal space per clove.
- Plastic nursery pots work fine and are cheap—the big black ones from Tractor Supply run about $3–5 each. I used a mix of those, two fabric grow bags (the 5-gallon kind, roughly $8 for a two-pack on Amazon), and one terracotta pot I regretted because it dried out in two days flat.
- Fabric grow bags performed best overall. Better drainage, better air circulation to the roots. They also freeze faster in cold snaps, which matters in Tennessee Zone 7a—something I’ll get to later.
- Avoid glazed ceramic for garlic unless you’re willing to drill extra holes. It holds moisture too well and you can’t tell what’s happening in there.
- Dark-colored containers in full sun locations can overheat the soil in early fall before temperatures drop. I didn’t think about this until I noticed one pot that sat in direct afternoon sun had cloves that basically cooked before they had a chance to root. Light-colored containers or a slightly shaded afternoon spot helps.
The garlic-in-containers math that surprised me
Before I planted anything, I convinced myself that container garlic would be cost-effective. I did the math out loud to Ben and he just said, “Okay, sure” in the voice he uses when he doesn’t want to argue about it yet.
Here’s the thing I kept bumping into: a single bulb of seed garlic—the kind you actually want to plant, not supermarket garlic that’s been treated—runs about $1.50 to $2.50 per bulb from a reputable source. I ordered Inchelium Red and German Red from Southern Exposure Seed Exchange, which is one of the better sources for varieties suited to the Southeast. A half-pound of seed garlic gave me roughly 15–20 cloves, depending on bulb size, and cost about $9. Each clove grows one head. If everything goes right, you get one head of garlic back per clove planted. At the grocery store, a head of garlic is $0.79 on a cheap week.
I am not saying don’t do it. The varieties you can actually grow yourself taste different—stronger, more complex—and you can save your own seed stock after the first year, which changes the math significantly. But if you’re doing the container version specifically to save money on garlic, I don’t know that the numbers work out, especially once you factor in potting mix and the containers themselves. I spent somewhere around $45 total on my container setup for a yield I haven’t fully calculated yet. Ben did not say “I told you so” but he also didn’t not say it.
- Use seed garlic from a reputable source, not grocery store bulbs
- Southern Exposure Seed Exchange and Keene Organics both ship varieties suited to Zone 6–7
- Plan for one head of garlic per clove planted—that’s the ceiling, not the floor
- Containers, potting mix, and seed garlic will cost $30–50 for a small first setup
- Year two is cheaper if you save your biggest heads for replanting
Getting soil and drainage right (the part everyone skips)
I skipped this part the first time. Do not skip this part.
- Don’t use straight garden soil in containers. It compacts. Garlic roots can’t push through compacted soil, and the drainage becomes terrible fast. I made this mistake with two pots and didn’t understand why they looked worse than the others for weeks.
- Start with a quality potting mix, not potting soil. There’s a difference. Potting mix is lighter and usually includes perlite. I used Fox Farm Happy Frog, which runs about $22 for a 2-cubic-foot bag at most farm stores, and it worked well. Some people swear by mixing their own—equal parts compost, perlite, and coconut coir—which is cheaper if you already have those things.
- Add extra perlite regardless. Even good potting mix benefits from another 20–25% perlite mixed in for container garlic specifically. You want water to drain through in under 30 seconds when you pour it in the top.
- Add a layer of gravel or broken pot shards at the bottom. About an inch. This keeps the drainage hole from getting clogged with soil over time.
- Fill to about 2 inches from the top, then water it thoroughly before planting. Let it settle. You’ll probably need to add a little more mix after it settles down.
- Plant cloves pointy-side up, about 2 inches deep. Space them 6 inches apart in the container. Pat down gently—you want soil contact, not compression.
- Top with an inch of straw mulch once cloves are in. This helps regulate temperature through fall and winter temperature swings, which in Tennessee can be significant even in Zone 7a.
The watering situation that still confuses me
I have read, in various places, that garlic wants consistently moist soil and also that garlic hates wet feet and wants to dry out between waterings. I have not found a way to reconcile these two things. The advice I got from a woman at the Cookeville farmers market was “water it like you’d water a succulent, not like you’d water a tomato.” That made sense to me, so I mostly let containers dry out between waterings in fall and early winter.
But I also told you above that the potting mix should drain fast and you should keep it from drying out with mulch. I’m aware those two things are in tension. My best guess is that garlic wants moisture available but not sitting, which sounds obvious but in practice is hard to calibrate in a container on a porch that gets afternoon sun. I watered when the top inch was dry. Some of my best-performing plants were in the containers I forgot about for a week. Some of my worst were in containers I watered on a schedule. I don’t have a clean answer here.
“The container I forgot about on the north end of the porch for ten days came in better than the one I checked every morning.”
My first batch basically failed
I planted my first round in late September, which was too early. I’d read that garlic needs a cold period to vernalize—to trigger bulb formation—but I got impatient and figured earlier was safer. The cloves sprouted fast, grew tall green tops through October and November, and then went into winter already tired. A few died back completely in a hard freeze in January. The ones that made it through produced small, poorly formed bulbs the following June. Not unusable, but not what I was hoping for.
I also planted two containers with softneck varieties—Inchelium Red is a softneck—which is fine, but I hadn’t done enough research on hardneck vs. softneck performance in containers and in the South specifically. Hardnecks are generally better suited to Zone 7 because they handle the cold period more reliably. I would have gotten better results starting with a hardneck like Chesnok Red or Music.
I don’t have a lesson from this that feels satisfying. I planted wrong, I used the wrong variety for the context, and I got a poor yield. The second round went better because I did the obvious things differently, but I’m not going to pretend the first failure taught me something profound. I just did it wrong and then did it less wrong.
Why November planting actually matters
In Zone 7a—which covers most of middle Tennessee—the target planting window for garlic is mid to late October through mid-November. The goal is for cloves to put down roots before the ground freezes, then go dormant, get their cold hours in, and break dormancy in late winter to form bulbs by early summer.
Container garlic has a specific complication here: pots freeze faster and harder than in-ground beds. When we had a stretch in January where nighttime temps dropped to 18°F, my fabric grow bags froze solid overnight. In-ground garlic would have been insulated by the earth. I moved the containers up against the farmhouse wall on those nights, which helped, but it was one more thing to track.
The flip side: containers warm up faster in late winter and early spring, which can give container garlic a jump on pushing new growth. Whether that advantage outweighs the freeze risk depends on your specific setup and how cold your winters actually get. In a typical Tennessee winter—Zone 7a, last frost around mid-April, lows occasionally in the teens—I’d say the freeze risk is manageable with a little attention but not ignorable.
Plant in the first two weeks of November. Not September. Not late November if you can help it.
TL;DR: Container garlic works but costs more than you think, requires real drainage setup, needs November planting in Zone 7a, and will probably disappoint you the first time.
The thing I still can’t explain
I had seven containers total in my second-round planting. Six of them were as close to identical as I could make them—same potting mix batch, same variety (German Red hardneck), same pot size, same clove depth, same porch location. One container, the third one from the left if you’re standing at the porch steps, produced noticeably larger bulbs than the other five. Not dramatically larger, but consistently larger. Every single clove in that container came out bigger.
I looked at it from every angle I could think of. Same sun exposure. Same watering schedule. Same everything. Ben suggested maybe the soil settled differently in that one, or that I’d accidentally added more compost to it. Maybe. I didn’t measure obsessively, so I can’t rule that out. Hank had taken to sleeping on top of that pot for most of November, curled up on the mulch, which—I don’t know. Probably not relevant. But that container just did better and I have no clean explanation for it.
I put a piece of tape on the bottom of it so I can track whether it happens again this season. I replanted it the same way as the others two weeks ago. I’ll see what happens in June.