Small Space Vegetable Garden Design: Our Aesthetic Without the Price Tag
Ben looked at my graph paper layout sketch last spring and said, “You know you could just put the beds where the dirt is good and call it done.” He wasn’t wrong. But the graph paper is also why our small space vegetable garden design actually has an aesthetic instead of just looking like we dropped things in the yard and walked away. Both things are true at the same time and I’m still annoyed about it.
We’re working with about a half-acre of cleared kitchen garden space plus three raised beds and a greenhouse that lists slightly to the east—Ben says it’s fine, it’s been fine for two years, I am still watching it. Coming from the suburbs with zero gardening experience, the first thing I figured out is that small space design either looks deliberate or it looks like a problem. The line between those two is mostly just planning and a few good scavenged materials.
How to Design a Small Space Vegetable Garden in 6 Practical Steps
This is the actual sequence I’d use if I were starting from scratch. Not the romantic version. The one that gets food in the ground without wasting a season on mistakes I already made for you.
- Map your sun before anything else. Walk your space at 9am, noon, and 3pm on the same day and note where shade falls. In Zone 7a Tennessee we don’t get last frost until mid-April, so you have time to do this right before planting. Tomatoes and peppers need 8 hours minimum. Lettuce and herbs tolerate 4-6. Getting this wrong costs you a whole season.
- Decide on a traffic path first, then fit beds around it. Most people do this backwards. A 24-inch path between beds sounds like enough until you’re hauling a wheelbarrow through there in July. Make it 30 inches if you can. The beds shrink slightly; the frustration shrinks a lot more.
- Limit yourself to three bed shapes. Rectangle, square, or L-shape. Curved beds look great in magazines and are a pain to weed at the edges. We tried a curved front bed our first year. I spent the whole season fighting crabgrass in the inside curve.
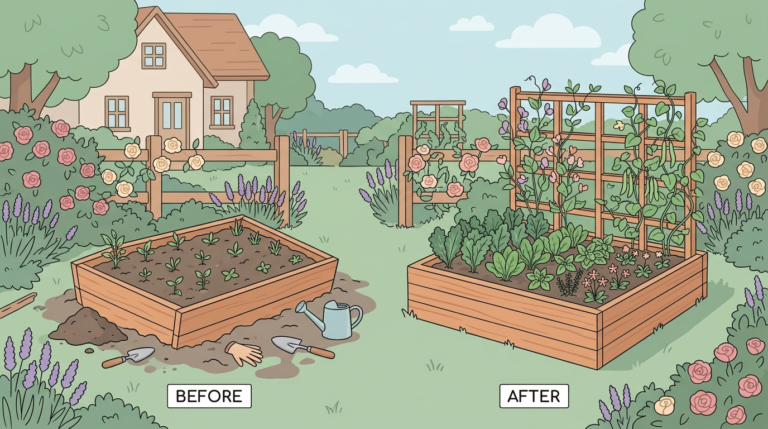
- Use vertical space on your north edge. A cattle panel trellis—Tractor Supply sells them for around $25 each—planted with pole beans or cucumbers on the north side of your garden keeps vines off shorter plants without shading them. This single move probably added 30% more yield to our raised beds without adding square footage.
- Group by water needs, not by what sounds good together. Herbs next to tomatoes sounds logical but basil wants consistent moisture and tomatoes want to dry out between waterings. Put drought-tolerant plants together. Group the thirsty ones. Your watering routine gets easier and the plants stop competing.
- Leave one bed fallow or in cover crop for the first year if you can. This is the advice nobody wants to hear. But soil you’ve rested and amended—even just with a bag of compost and a $12 cover crop seed mix—produces more in year two than exhausted soil produces in years one through three combined. UT Extension has free soil testing that will tell you exactly what your ground needs before you spend money on amendments you might not need.
Ben Says I Overthink This
His actual words were closer to, “Rachel you’ve been looking at this sketch for forty minutes, it’s a garden.” And technically he built our third raised bed without measuring the lumber and it came out square. He eyeballed the spacing between beds and it’s fine. He once read on a forum that you can start tomatoes under a shop light on a wire shelf and did exactly that, and those were the best seedlings we’ve had.
But here’s what the overthinking produced: an herb spiral that actually drains correctly, a bed placement that doesn’t flood in April, and a trellis system that didn’t need to be rebuilt after one season. Ben’s instincts are good. My research gives those instincts somewhere useful to land. Neither approach alone would have gotten us here.
The contradiction I can’t resolve is that the aesthetic part—the thing that makes the garden look like something on purpose—comes directly from the overthinking. The hours with graph paper. The decision to use matching cedar edging on two of the beds. If I’d just put things where the dirt was good, we’d have vegetables and no visual coherence whatsoever. Whether that matters is genuinely up to you.
Repurposed Materials That Actually Look Good
Salvaged wood raised beds: yes, if the wood is thick enough not to warp by August. Pallets: honestly no. Everyone says pallets. Pallet wood is thin, it splinters, and it looks exactly like what it is—a pallet taken apart. We tried it. By midsummer the whole bed looked ragged.
Old galvanized stock tanks as planters work extremely well and hold up for years. Check Facebook Marketplace for dented ones. We paid $35 for a 100-gallon tank with a hole in the side, Ben patched the hole, and it’s now our best tomato bed. The drill drainage holes through the bottom step is not optional—I skipped it once and lost an entire pepper planting to root rot in a wet June.
Salvaged brick as bed edging is genuinely pretty and free if you know anyone doing a renovation. Mismatched bricks bother some people. It doesn’t bother me. The varied colors look more interesting than a uniform plastic border.
What we’re still not sure about: using old wooden windows as cold frame lids. They look exactly right. They’re also heavy, the wood is starting to soften on two of them, and I don’t fully trust them not to collapse on a plant in a windstorm. Jury’s still out after two winters.
The salvaged galvanized tank cost $35 and outlasted two seasons of store-bought plastic planters we spent three times more on.
The Year We Tried Matching Everything
Second summer here. I’d watched enough garden videos to convince myself that the problem with our garden looking thrown-together was a lack of visual cohesion. I bought a set of matching terracotta-colored square planters, the kind that come in a kit with a drip tray and a neat little saucer. Not cheap. Around $180 for six of them.
By July, two had cracked from the heat. One tipped over in a storm and I never found the saucer. The plastic faded unevenly—the ones in direct afternoon sun went pale and weird while the shaded ones stayed dark. By August I’d moved most of the plants into mismatched containers and the fancy planters were stacked in the corner of the greenhouse gathering dust.
We still have them. Ben keeps saying he’ll repurpose the intact ones for something. That was fourteen months ago.
What I learned: the aesthetic that actually holds up comes from consistent materials, not matching products. All galvanized metal reads as cohesive. All weathered wood reads as cohesive. A mix of new coordinated plastic kits looks fine in April and looks sad by July.
Watering Without Overthinking It
- Drip irrigation on a timer for raised beds—a basic kit from any hardware store runs $30-50 and pays for itself in one season of not hand-watering
- Water in the morning, not the evening, to reduce fungal issues—this matters more in humid Zone 7a than in drier climates
- Group containers together so one soaker hose run covers them all
- A rain gauge ($8, hardware store) is more useful than a soil moisture meter for outdoor beds—check it after rain and adjust your timer accordingly
- Deep water less often rather than shallow water every day—for most vegetables, every 2-3 days in summer works better than daily light watering, and root systems grow deeper for it
The one thing that contradicts the whole “design takes time” framing earlier: once the drip system is in, watering takes about four minutes to check and zero minutes to do. The setup investment was a single afternoon. Don’t overthink the watering. Get a timer. Done.
Does Any of This Actually Save Money?
I keep a rough garden journal—mostly complaints about squash bugs and late blight, but I started tracking costs in year two. The seeds, starts, amendments, hardware, and repaired infrastructure came to about $340 last season. The produce we harvested—and I’m estimating based on grocery store prices for equivalent items—was probably worth $400 to $500. So we came out ahead. Barely.
Except I’m not counting my time. If I billed my garden hours at even half my bookkeeping rate, we’d be deeply in the red every single year. The tomatoes we grew are not cheaper than the tomatoes at the farmers market. The pleasure of growing them is real, but it isn’t financial efficiency.
The USDA’s agricultural research resources and most extension services will tell you that home vegetable gardens can reduce household food costs, and that’s technically true—if you value your labor at zero. Most homesteaders don’t talk about this directly. The honest version is that we grow food because we want to, because the quality is better, because something about controlling part of our own food supply matters to us. “Saving money” is a nice side story that sometimes pencils out and sometimes doesn’t.
I haven’t resolved this. I’m probably not going to.
The Imperfection Is the Point
The gardens I actually stop and look at—on the extension service demonstration plots, at the farmers market, online—are never the ones that look like a catalog photo. They’re the ones where you can see decisions layered over time. The bed that got extended with a different wood because they ran out. The trellis made from conduit and twine next to the one made from cedar. The galvanized tank with the visible patch.
Our garden looks like we’ve been figuring it out for three years because we have been figuring it out for three years. The leaning greenhouse, the mismatched edging, the cattle panel trellis Ben put up slightly crooked—all of it shows. Hank has knocked over approximately four seed packets this spring and I’ve stopped trying to shoo him out of the beds entirely. Some mornings I come out to chores and the whole place looks like exactly what it is: a work in progress that produces real food.
If you’re starting from scratch, don’t wait until it looks finished to plant. Plant in whatever you have, fix the aesthetic as you go, and let the visible adaptation be part of what makes it yours. That’s the actual version of small space vegetable garden design that holds up past one season—not the matching planters, not the perfect layout, just the accumulation of things you tried and adjusted until they worked.