I Tried Fancy Raised Garden Bed Designs—Here’s What Actually Worked in Small Spaces
The soil smells different when it’s warm—almost sweet, a little like wet cardboard—and I was crouched over our third raised bed last spring noticing that when I realized I’d spent more time designing it than planting in it. That’s a specific kind of failure. If you’ve been down the rabbit hole of raised garden bed designs for small spaces, you know exactly what I mean: the Pinterest boards, the forum threads at midnight, the spreadsheet that was supposed to solve everything. We did all of it. Most of it didn’t help.
What actually helped was considerably less glamorous. Here’s what three years of experimentation on our half-acre kitchen garden in Zone 7a Tennessee has taught me, starting with the stuff I wish someone had told me before Ben built that first cedar box.
The Four Dimensions That Actually Matter
Before anything else: the physical specs. Everything else in this article is context. These are the numbers we keep coming back to after trying basically every variation.
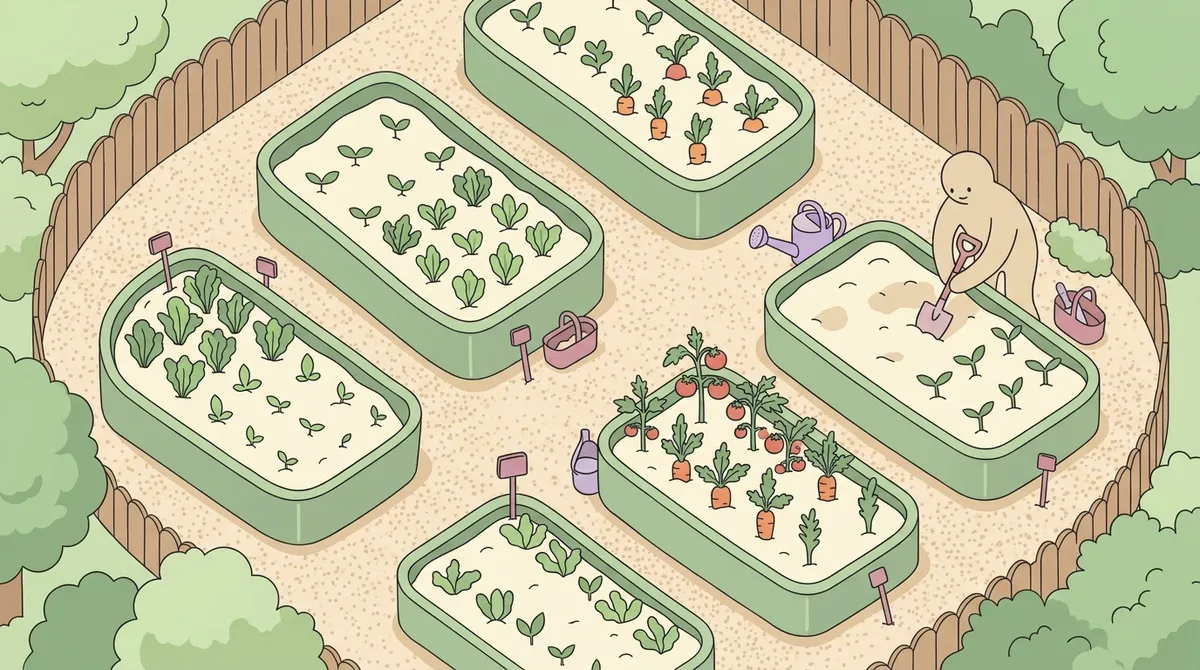
- Width: 2 to 3 feet maximum. Not 4 feet. I know every plan online says 4 feet is fine if you can reach from both sides. See the section below about that. For a single-access bed against a fence or wall, 18 inches is not too narrow. We have two beds that are 22 inches wide and they’re the most productive ones we own.
- Length: whatever fits, but 8 feet is the practical ceiling. Longer than 8 feet and you’ll start walking around the bed instead of using the end access points, which defeats the purpose. Our 12-foot bed gets treated like a 6-foot bed with a dead zone in the middle.
- Height: 8 to 10 inches, not 12. This contradicts a lot of advice. More on that below too. Taller looks better. It is not better.
- Aisle width: at least 24 inches. We started with 18-inch paths between beds. You cannot comfortably kneel, turn around, or carry a harvest basket through 18 inches. We lost a full bed’s worth of growing space widening those paths in year two, and it was still the right call.
These specs work for our Tennessee climate, which means we’re planting cold-hardy crops from late February and pushing the season until November with row cover. Your last frost here is typically mid-April, so we’re starting tomatoes indoors in early March and not transplanting until early May. The bed dimensions don’t change by season, but they do affect what you can plant—narrow beds limit sprawling crops like squash, which is actually a feature, not a problem.
Ben’s Cedar Box Phase
Our first raised bed cost around $280 in cedar lumber and a full Saturday of Ben’s time. It was beautiful. Twelve inches tall, dovetail corners, a little shelf built into one end where Ben thought I’d set my coffee. He’d found a plan on a homesteading forum at some point—I remember him showing me his phone at 11pm, scrolling through comments—and he was genuinely proud of it.
The problems started immediately. Twelve inches of depth requires a lot of fill. We spent another $90 on soil mix and still had to haul compost from the pile behind the barn to top it off. The bed dried out faster than our in-ground beds because the tall walls created more surface area exposed to air. And the wood, despite being cedar, started showing stress at the corners by the end of year one because Ben had built it on ground that wasn’t quite level and the whole thing racked slightly every time the soil expanded with rain.
Ben does not think this was a failure. He still refers to that bed as “the good one.” We still use it. It produces fine. But we spent about four times what we needed to and the yield is not four times better than the $60 beds we built the following spring. I asked him once if he’d do it the same way again and he said, “I mean, probably yeah, it looks really good,” which is not an answer I find useful but is very Ben.
Why Narrow Beds Win in Tight Quarters
The practical case for narrow beds in small spaces is simple: you plant more densely, you reach everything without stepping in, and you stop treating the center of the bed like it belongs to someone else. Most of us with limited garden space are not working with the luxury of approaching a bed from two sides. We’ve got a fence, a wall, a path, a greenhouse that leans a little to the left. One side is accessible. Build for that reality.
Our two narrowest beds—22 inches wide, running along the south fence—grow more food per square foot than anything else we have. Carrots, lettuce, green onions, radishes, beets. Dense plantings that we direct-sow starting in late February, harvesting in waves, and replanting every three to four weeks through June. The width forces succession planting because you simply can’t fit a massive single planting in there. That constraint turned out to be useful.
For anyone serious about raised garden bed designs for small spaces, I’d argue the width question should come before anything else—before materials, before height, before location. A 2-foot wide bed along a 10-foot fence gives you 20 square feet of highly accessible growing space. A 4-foot wide bed in the same spot gives you 40 square feet, half of which you will ignore from March to October.
Accessibility—An Unresolved Problem
Design blogs love to say that 4-foot wide beds are fully accessible because “you can reach 2 feet from either side.” I have a specific question about this: what do you do when one side is a fence? Or a path you can’t kneel on because it’s gravel? Or when you’ve planted the back half with staked tomatoes and the stakes are in the way?
We still have one 4-foot wide bed that sits against our herb spiral on one side and a gravel path on the other. Technically I can reach the center from both sides. In practice I have reached through tomato stakes, over pepper plants, and across a cage of basil to weed the back half of that bed approximately twice this entire season. The rest of the time it gets weeded when I’m harvesting and happen to be close enough. That’s not a system.
I keep meaning to rip out half of it and narrow the bed. Ben thinks this is unnecessary. “Just reach further,” he said, which is advice I do not know what to do with. The bed is still 4 feet wide. This problem is unresolved.
How to Maximize Vertical Growing Without Crowding
This is where small-space beds actually have an advantage: you’re forced to go up. We use cattle panels from Tractor Supply—the 16-foot ones that run about $30 each—bent into arches over our narrow beds, and they’ve been the single best investment in the garden. Here’s how we handle vertical growing without turning a small bed into a tangled mess:
- Put the trellis on the north edge of the bed first, before you plant anything. We learned this wrong twice. Retrofit trellising damages roots and you’ll spend an afternoon swearing.
- Cattle panel arches work for cucumbers, pole beans, and small squash. Not for indeterminate tomatoes. Tomatoes need individual stakes or cages—we use the heavy-gauge wire cages from Tractor Supply, not the cheap conical ones, which collapse by August.
- Plant shade-tolerant crops underneath your vertical structure. Lettuce and spinach do fine under a cucumber arch. We get a second use out of the vertical space without crowding the main crop.
- Leave 12 inches between the base of your trellis and your next planting. Less than that and you’re always fighting the structure to get to the plants.
- Tie early and often. We use silicone plant ties from Amazon, the stretchy ones in a 328-foot roll for about $8. Worth it. Twine cuts into stems when plants get heavy.
The Compost Depth Contradiction
I said earlier that 8 to 10 inches is the right bed height. I want to complicate that, because we also have beds filled to only 6 inches of amended soil over cardboard, and beds filled with a full 12 inches of compost-heavy mix, and the yields from all of them are close enough that I can’t tell you with confidence that depth is the determining factor.
The 6-inch bed grew better tomatoes than the 12-inch bed last August and I wrote it down in my garden journal as a complaint because it didn’t make sense.
My working theory is that what’s in the soil matters more than how much of it there is, up to a reasonable minimum. But I don’t have enough controlled data to say that confidently, and anyone who tells you they do is probably working from someone else’s data. We fill shallow beds with a higher proportion of finished compost and deeper beds with more topsoil. Maybe that’s the variable. We don’t actually know.
Recycled Materials Changed Everything (We Still Don’t Know Why)
The summer we started using broken-down pallets and salvaged concrete blocks for new beds, yields went up noticeably. Not dramatically, but enough that I put it in the garden journal. Concrete blocks especially—stacked two high, no mortar, filling the cavities with soil—seem to grow things faster than any of our cedar or pine lumber beds in the same location.
I have heard theories. Thermal mass from the concrete. Microbiome differences from older wood. Drainage. I cannot tell you which one is true or whether any of them are. The pallets are free from a flooring warehouse in town. The concrete blocks are about $2 each at the hardware store. Both outperform the $280 cedar box in raw volume, which Ben refuses to accept as meaningful data.
The Year We Abandoned the Master Plan
Our second spring here, I made a full garden layout in a spreadsheet. Companion planting, crop rotation zones, a three-year soil amendment schedule, bed labels, succession planting dates. It took me probably six hours across several evenings. I was very pleased with it.
We followed it for approximately six weeks. Then June got out—she’s the calm one, which somehow makes her escapes more disorienting—and ate the entire northwest quadrant of the plan before we noticed. Then we had an unexpected stretch of heat in May that killed the lettuce I’d planned to harvest in June. Then Ben got a good deal on six tomato starts from a neighbor who was moving and we planted them without checking where they were supposed to go according to the spreadsheet.
I don’t know where the spreadsheet is. I looked for it last fall and couldn’t find it. We now place beds where we have room, plant what we have seeds for, and write down what worked in the journal that is mostly complaints about squash bugs. This is worse as a system and roughly equivalent in output. I have thought about making a new spreadsheet several times and have not done it.
Yesterday I moved one of the concrete block beds about three feet to the west because it wasn’t getting enough afternoon sun. It’s sitting on bare ground now with the plants still in it, waiting to be replanted into the adjusted position. I haven’t done that yet.