The 3 Food Preservation Tricks I Wish I’d Known My First Year Homesteading
“You know you can just hang them upside down, right?” Ben said, watching me fiddle with the dehydrator settings for the third time that morning. I had basil wilting on the counter and was determined to preserve our herb harvest using what I thought were proper food preservation methods. Turns out I was overthinking it by about seventeen steps.
Three years into this homesteading thing, and I’m still learning that the simplest approaches usually work best. That first summer, I lost more produce to my own complicated preservation attempts than to pests or weather. The herbs rotted while I researched optimal drying temperatures. The cucumbers went soft while I debated pickle recipes. Meanwhile, our neighbor Martha was turning out perfect preserves using methods her grandmother taught her.
The Easiest Way to Dry Herbs (That I Wish I’d Tried Sooner)
Ben was right about the upside-down thing. I spent our first season running the dehydrator constantly, watching electricity bills climb while perfectly good herbs shriveled into expensive dust. The machine worked, technically, but it was slow and the results tasted like cardboard.
The answer was hanging right there in Martha’s kitchen the whole time. She showed me her setup – bundles of herbs tied with kitchen twine, hanging from a wooden drying rack Ben could build in an afternoon. “Air circulation is what you need,” she said, “not fancy gadgets.”
I harvest herbs in the morning after the dew dries but before the heat gets intense. Cut stems about six inches long, remove any damaged leaves, and bundle five or six stems together with twine. Hang them somewhere with good airflow but out of direct sunlight. Our kitchen pantry works perfectly – it stays cool and has a small window for ventilation.
Most herbs are ready in a week to ten days. They should crumble easily when you rub a leaf between your fingers. Store them whole in mason jars – don’t crush them until you’re ready to use them. The flavor stays stronger that way.
- Harvest in the morning after dew dries
- Bundle 5-6 stems with kitchen twine
- Hang in a cool, dark place with good airflow
- Ready in 7-10 days when leaves crumble easily
- Store whole leaves in mason jars
What Martha Told Me About Pickling
“Stop reading recipes on the internet,” Martha said when I complained about my soggy pickle disaster. “Use this ratio and quit fussing.” She handed me an index card with her grandmother’s quick pickle formula written in faded blue ink.
Her method is embarrassingly simple: one part vinegar to one part water, plus salt and whatever spices you like. Heat it up, pour it over your vegetables in a clean jar, and stick it in the fridge. That’s it. No boiling water baths, no special equipment, no worrying about pH levels.
The key, according to Martha, is using vegetables that are still crisp. “If you wouldn’t eat it fresh, don’t try to pickle it,” she said. I learned this the hard way with some questionable cucumbers that turned into expensive mush.
These refrigerator pickles keep for months and taste better than anything I managed with the complicated canning recipes. I’ve used her formula for everything – green beans, carrots, radishes, even some experimental batches with our excess herbs mixed in.
The Canning Mistake I’m Still Trying to Shake
I bought a pressure canner before I understood what I was doing. It seemed like the serious homesteader thing to do – preserve everything properly, build up a pantry full of home-canned goods, become self-sufficient. The reality was twelve exploded jars of green beans and a kitchen that looked like a war zone.
The problem wasn’t the equipment. It was me, following directions like they were suggestions instead of requirements. I figured altitude adjustments were optional recommendations. I thought processing times were rough estimates. I was wrong on both counts.
That pressure canner still sits in our pantry, barely used. Every time I look at it, I remember the smell of overcooked beans and the sound of glass breaking. Ben keeps suggesting we try again, but honestly, the simple methods work fine for what we need.
About the Root Cellar Situation
Everyone talks about root cellars like they’re magic storage solutions. Maybe they work great if you have the right setup, but our attempts have been mediocre at best. We dug out a corner of the basement, added ventilation, monitored temperature and humidity like it was a science experiment.
The potatoes sprouted anyway. The carrots went rubbery. The apples lasted longer than in the kitchen, but not by much. Ben thinks we need better insulation. I think we need to accept that our basement isn’t built for this.
Our neighbors swear by their root cellars, so maybe it’s a matter of location or construction. For now, we’re sticking with the old refrigerator in the garage for winter storage. Less romantic, more reliable.
4 Steps to Freezing Vegetables the Right Way
This is where I actually figured something out. Freezing vegetables properly made a huge difference in our winter eating, once I stopped skipping the blanching step.
Here’s what works:
1. Blanch first, always. Bring a big pot of water to boiling, drop in your vegetables for the recommended time (green beans need 3 minutes, broccoli needs 2, corn kernels need 1). This stops the enzymes that make frozen vegetables taste awful.
2. Ice bath immediately. Have a bowl of ice water ready. As soon as the timer goes off, scoop the vegetables out and plunge them into the ice water. This stops the cooking process instantly.
3. Dry thoroughly. Wet vegetables turn into ice blocks. Pat them dry with clean towels or let them drain in a colander until no water is dripping.
4. Pack properly. Use freezer bags or containers, squeeze out as much air as possible, and label with the date. Frozen vegetables keep for 8-12 months if you do this right.
I learned the hard way that skipping any of these steps ruins the whole batch. The green beans I froze without blanching tasted like grass clippings. The corn I didn’t dry properly turned into one giant frozen mass.
Somehow the Jam Turned Out Perfect
This contradicts everything I just said about simple methods being better. Our strawberry jam happened by accident – I was trying to make syrup and got distracted by Hank stalking something in the herb garden. When I came back, the berries had cooked down into perfect jam consistency.
No pectin, no candy thermometer, no recipe. Just strawberries, sugar, and a splash of lemon juice that I threw in because it seemed like something Martha would do. The jam set up beautifully and tastes better than anything I’ve made on purpose.
Ben says this proves I should trust my instincts more. I think it proves that sometimes accidents work better than plans. Either way, we’re eating that jam all winter and pretending I knew what I was doing.
Is It Even Worth Canning Our Own Tomatoes?
This question keeps me awake some nights. We grew about forty pounds of tomatoes last season, which sounds impressive until you calculate the time and money involved. Seeds, plants, cages, mulch, hours of weeding, more hours of harvesting, then the actual canning process.
Store-bought canned tomatoes cost about a dollar per can. Our homegrown ones, factoring in everything, probably cost closer to three dollars per can. They taste better, sure, but three times better? I’m not convinced.
Ben thinks the math will improve as we get more efficient. He’s probably right – our second season was definitely smoother than our first. But there’s something to be said for buying decent canned tomatoes and spending that garden space on crops that actually save us money.
I haven’t decided yet. This year we’re scaling back the tomato planting and seeing how much we actually miss having our own.
I Still Buy Half Our Groceries (And I’m OK With That)
Here’s what nobody tells you about food preservation: it doesn’t replace grocery shopping, it just changes what you buy. We preserve our herbs, freeze our green beans, make pickles with excess cucumbers, and still drive to town for groceries every week.
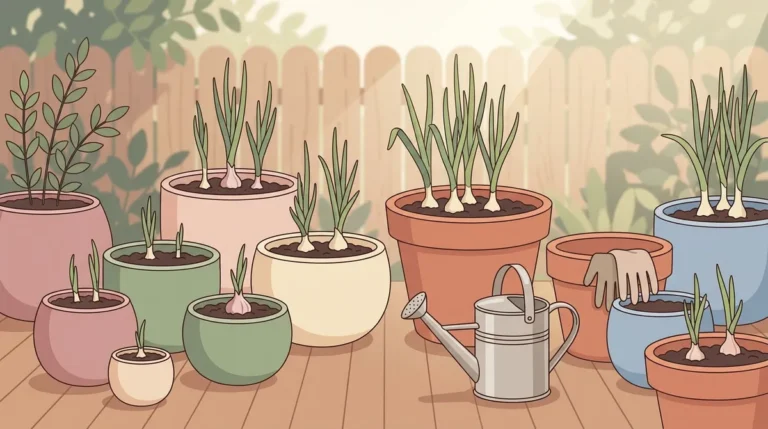
Some things aren’t worth preserving ourselves. Onions keep fine in the pantry without any special treatment. Potatoes last months in our makeshift garage storage. Carrots and apples stay crisp in the refrigerator longer than our preservation attempts.
The goal isn’t food independence – it’s eating better versions of things we grow well. Our frozen green beans taste infinitely better than store-bought. Martha’s pickle method turned our cucumber excess into something we actually want to eat. The herbs dried on Ben’s simple rack have more flavor than anything from the spice aisle.
But milk still comes from the grocery store. So does flour, coffee, and most of our winter vegetables. The homesteading magazines make it sound like failure if you’re not preserving everything, but honestly, preserving the stuff we’re good at growing makes more sense than trying to can our way to complete self-sufficiency.
Yesterday I tried dehydrating apple slices in the old dehydrator, just to see if I’ve learned anything. Hank knocked the tray off the counter while I was setting it up, scattering apple pieces across the kitchen floor. I gathered them up, rinsed them off, and hung them on Ben’s drying rack instead. We’ll see how that turns out.